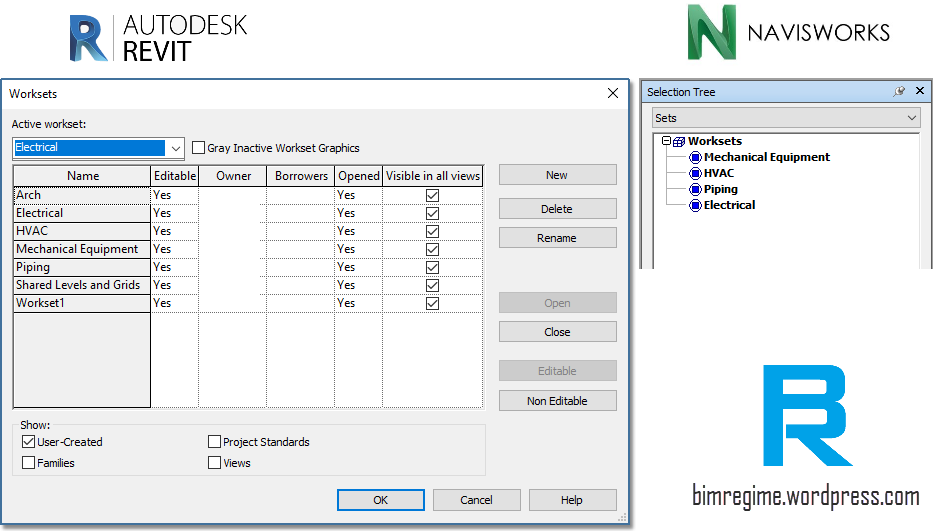
Ever wondered how to filter out elements in Autodesk Navisworks Manage by their Revit worksets?
Worksets in Navisworks can give you greater control over your model data. You can perform various filtering, formatting on the worksets. It is also easier to extract parametric data out of Navisworks when you have clearly defined worksets.
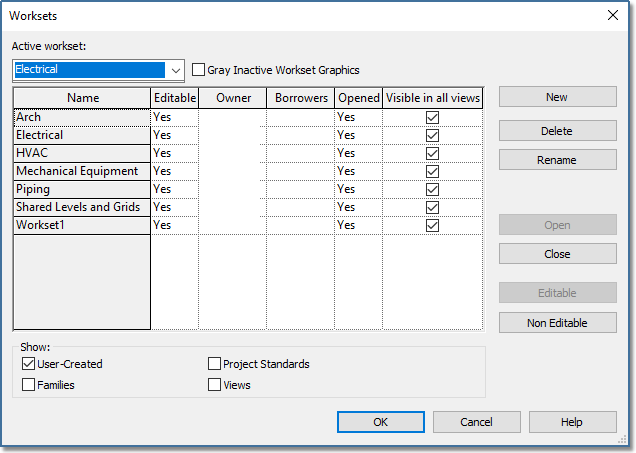
Worksets in Revit
Steps:
- Export the 3D model in NWC format. Remember to keep the “Close NWC/NWD files on load” checkbox ticked while saving as *.nwc. Without this checked, the file lock is on and you cannot overwrite the file unless you close the current Navisworks file where it is appended to.
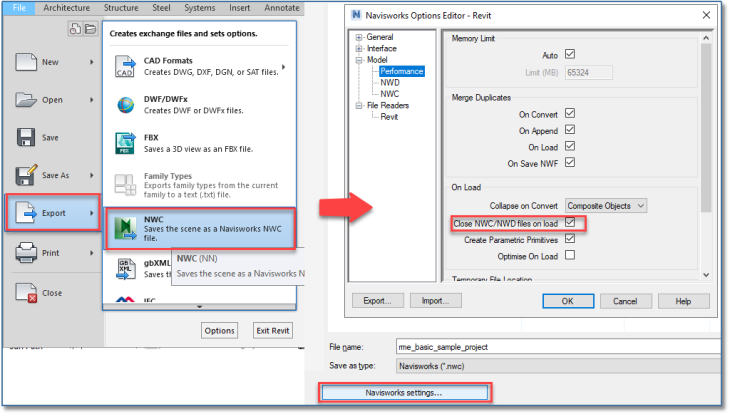
Exporting as *.nwc
2. Append the file in Navisworks Manage. Select any element and right-click and make sure that the Set Selection Resolution is kept as the First Object. It will make the object path start at the highest level of objects below the layer node, if applicable.
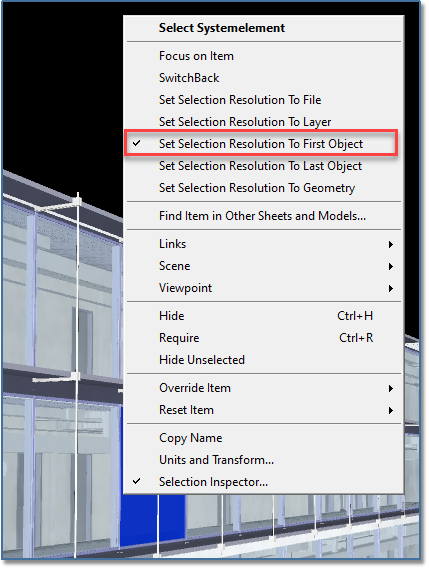
Set Selection Resolution setting
3. You can see all the property data of the selected Revit element from the Properties panel in the Home ribbon. This is for our viewing purpose.
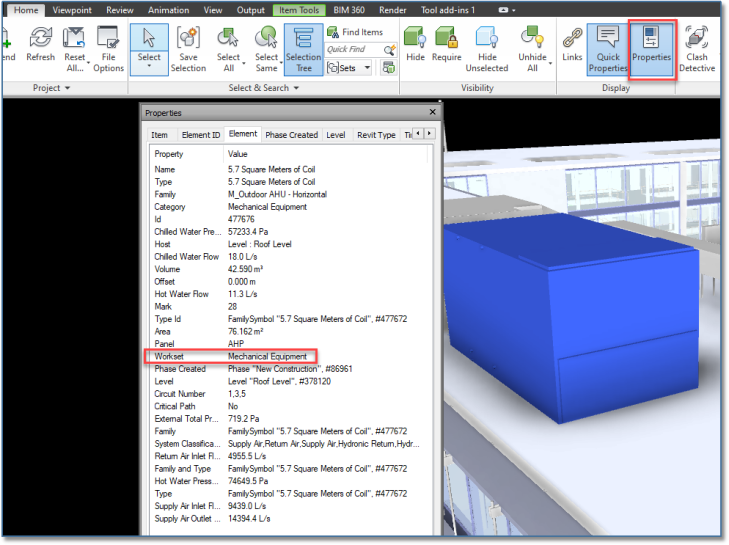
Properties in Navisworks
4. Now open Selection Tree panel (Ctrl+F12), and select Properties from the drop down menu.
As worksets are a property of the elements, go to Element > Workset.
Here you can find all the worksets (only those that contain elements) from your Revit project.
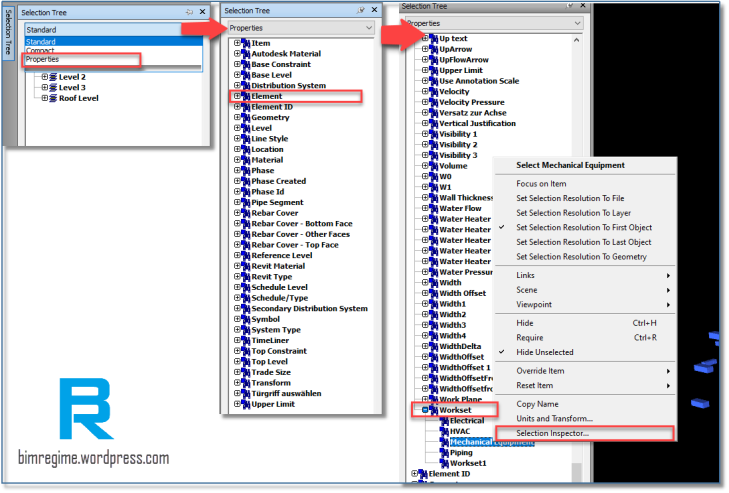
Workset Selection
5. You can right-click and tick Hide Unselected to isolate the elements of the specific workset.
Click on Selection Inspector and it will show all the elements of that particular workset. Click Save Selection for all the entities in Workset.
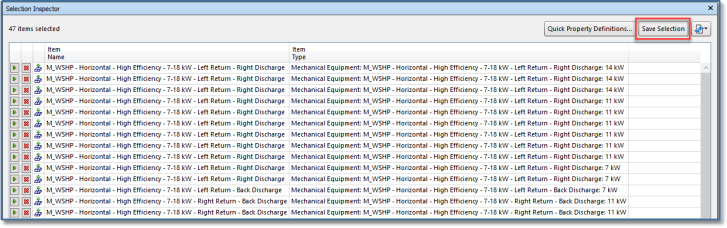
Save Selection for Workset
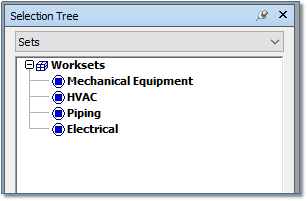
Now you can find all the worksets under the Sets in the Selection Tree. All the filtering and sorting could be performed on these worksets.
Workset Section Sets
Tip: To sort or filter elements of different categories based on their parametric values Find Items is a pretty handy feature.
Go to View > Windows > Find Items
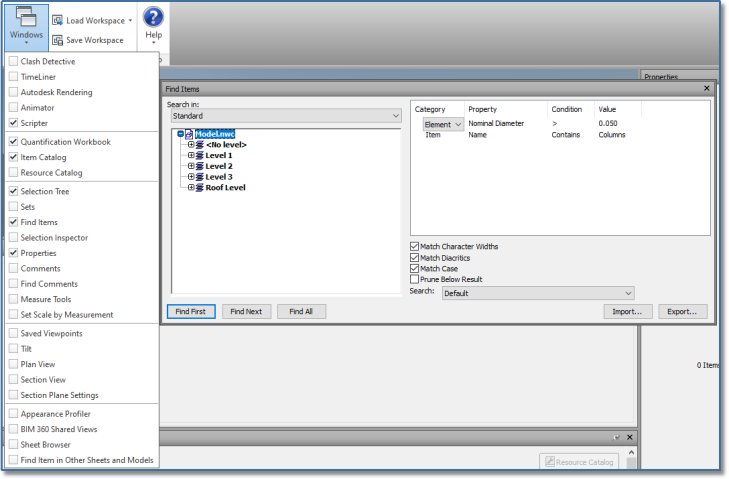
Find Items for filtering
You can search in the already defined worksets or other selection sets to narrow down the filtering.
